How To Guide On Building A 6ft Fence
Hi, when we are looking for a new fence, there are so many designs to choose from, but when it comes to simplicity and strength, the 6ft fence, built with tantalized timber is hard to beat for strength and durability. I will show you how to install a 6ft close board fence.
To get started on building the fence we must first order the materials (Listed Below) after we have all the materials, we then need the tools for the job also (Listed Below). Once we have both of these we need to clear the area where the fence will go. Now when it comes to clearing the way for the new installation, we need to make sure the ground is ready for the new fence to be placed.
Tip: Cover the ground where you will be walking with old boards, this will stop you ruining the turf
Is there any old concrete or postfix left in the ground from the old fence…? If so, then this will need to be removed. If you can, remove this first before trying to dig new postholes. If not, then try to dig new post holes between where the old posts were situated.
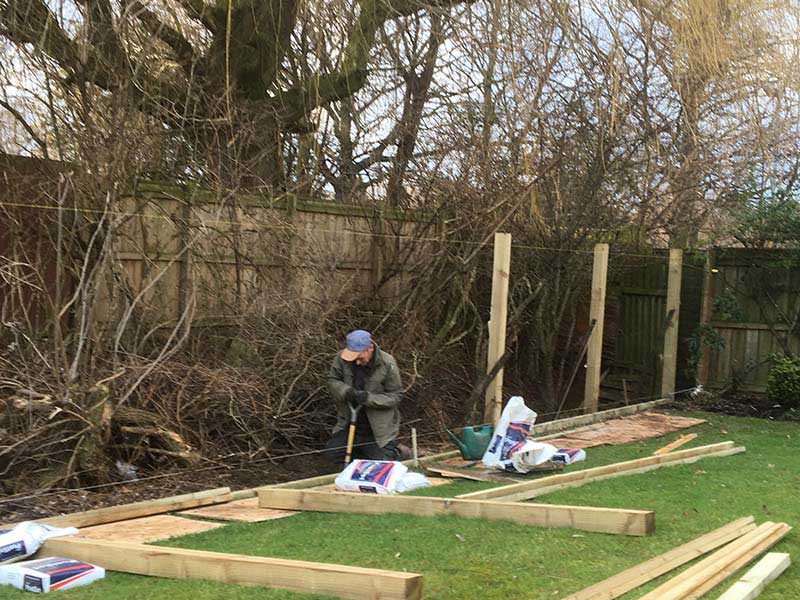
Assuming you can do either of these then its time to start. We will be using 8ft 100mm x 100mm tantalized timber posts for this garden fence build. Firstly dig a hole at one end of where the fence will be installed and approximately 2ft into the ground, which is a quarter of the overall length of the post we are using. This is also perfect depth for a 6ft fence hight above ground. Then dig a second hole at the other end at the same depth as first post. This is assuming it’s not too far to span a string line of approx. 18 meters. If its a lot more than 18 meters in distance then place the second post hole halfway between the first and the last post be situated.
Now place the post into the hole that you have excavated and using your spirit level, plumb the post on 2 sides, the opposite sides and fix into position using 3ft long bits of old timber to hold steady as we pour in the post-mix and water. Once you have poured both water and post-mix into the hole use old stick to mix together.
Tip: Just before the post-mix goes off, taper up the post so that the water does not pool near the bottom of the post. This will help the timber post last twice as long.
Repeat the step above for the second post. Let the posts have 10 mins or so to set solid, then its time to set the string lines. I use 2 string lines one about 6 inches from the top of the post and about 12 inches from the bottom ground level. Make sure the string is touching the face or front of the posts.
As you can see in the image to your above. The string lines are in place. It’s now time to dig the holes for the rest of the posts. Spacing between the posts for this size fence should be 1.8 meters and no more than 2 meters. When you are getting the post plumb you only need to touch the top of the post to the top string line and the bottom of the post to the bottom string line, this will keep the face or front of the posts plumb.
Tip: Dig the post holes about a third under the string line this will give you room to move the post into position against the string lines.
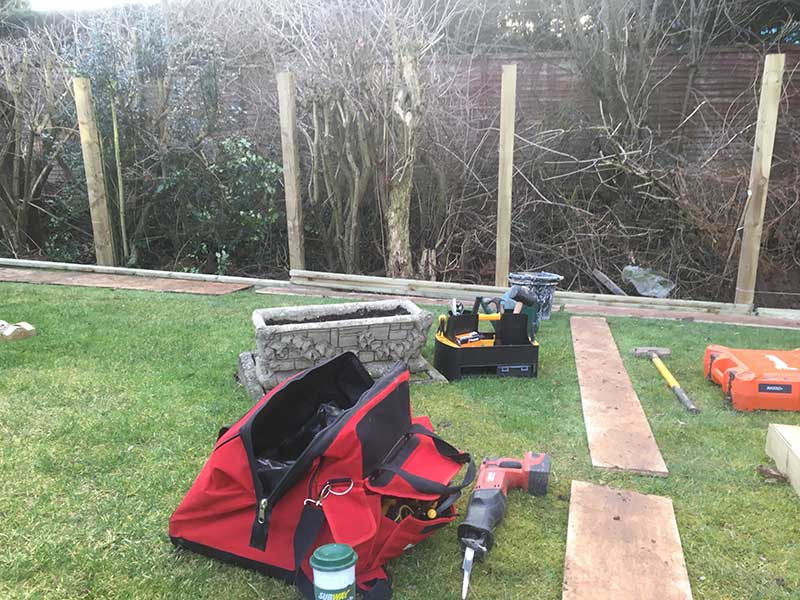
Now presuming you have dug all the postholes to a depth of 2ft and placed the string lines in the correct position. While also making sure the post holes are at 1.8-meter centers, which means center hole to the next post center hole, not the outside of the hole. If this is the case and you have completed those steps correctly then your posts should look like the image above.
Now all the posts have set its time to fix the fence rails. When fixing the rails keep the top rail around 6 inches from the top of the posts fixing with 75mm galvanized ring nails. Then the same for the bottom rail and measure the distance between the top and bottom rail. Now place your middle rail halfway between the top and bottom rails and fix using 75mm nails. After you have fixed the rails you should have something that’s starting to resemble a fence.
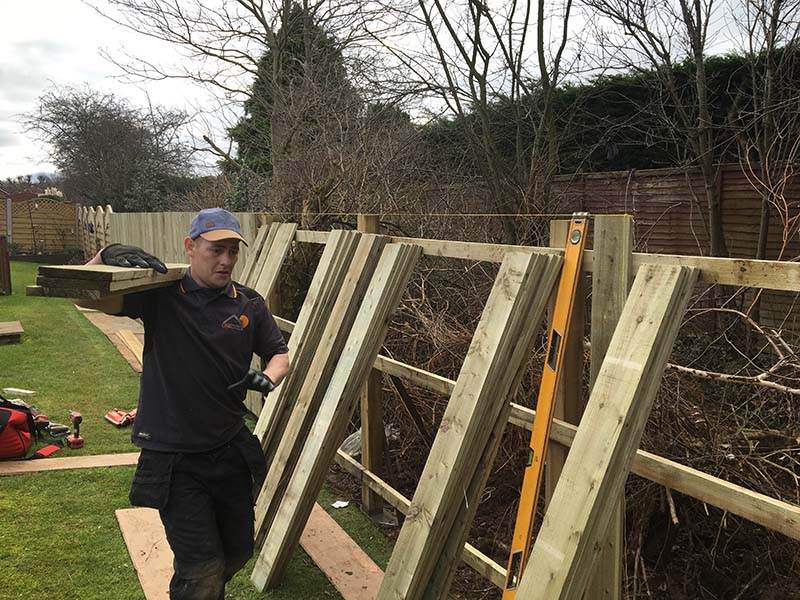
Stack the fence boards in piles of 6 every 3ft across the length of the fence Now that you have your rails attached you can start to place around 6 boards at a time in piles along the span of the fence. Time to fix the boards. Firstly take one board to the end of the fence where the first post is and fix to the fence at about 5 inches from the top of the board to the top of the fence rail, making sure that you use your spirit level to plumb up the fencing board. Then take another board to the other end of the fence or center depending on the length of the fence span itself and this time fix using screws at the same height 5 inches from top of board to top of rail, as this will have to be moved along when the fencing boards reach this point. Now that you have your 2 guide boards in place its time to put our string line on the top of the first and second boards you have just fixed to the fence rails. Tap a small nail into the top of the first and second boards and loop the string line over the top of one nail and pull the string line tight to the nail on the second board making sure it is taught not slack.
Time to fix the fence boards to the rails, using the string line as a guide to keep the boards nice and level across the span of the fence itself. After you have fixed several boards to the rails make sure you test for plumb every 6 boards or so with your spirit level. This will ensure the boards don’t creep, which means go off plumb. If they do start to creep then tilt the boards ever so slightly in the direction that will make the board true again, repeat till plumb and then carry on as before fixing the boards as you go, until the entire fence is covered.
Tip: Every now and then pluck the string line to make sure it’s not catching on splinters, which can make the boards go up slightly and give you uneven finish.

Tip: To fix the boards to the fence you can hire a nail gun for around £40 from any good tool hire company. This will speed up the process and there will be no bent nails for you to deal with.
Contact your local tool hire our builders merchant for more info on this or drop me a quick message and I will advise you on where to go and what type would suit for your project.
Now that we have covered the whole fence with boards and they are all nice and straight, its time to add the finishing touches, capping and gravel boards. Firstly fix the capping to the top of the fence by pulling any boards that are a bit bent in so that they fit into the groove on the bottom of capping and fix with fence board nails about every 2ft or so. The capping ads a finishing touch while also stopping the wood from distorting out of place in the changing climate, keeping the fence looking good all year round. If you try to do this at a later stage you will find its a real struggle to get all the boards into the groove when they are bent out of shape, so do this soon as possible after you have attached the boards.
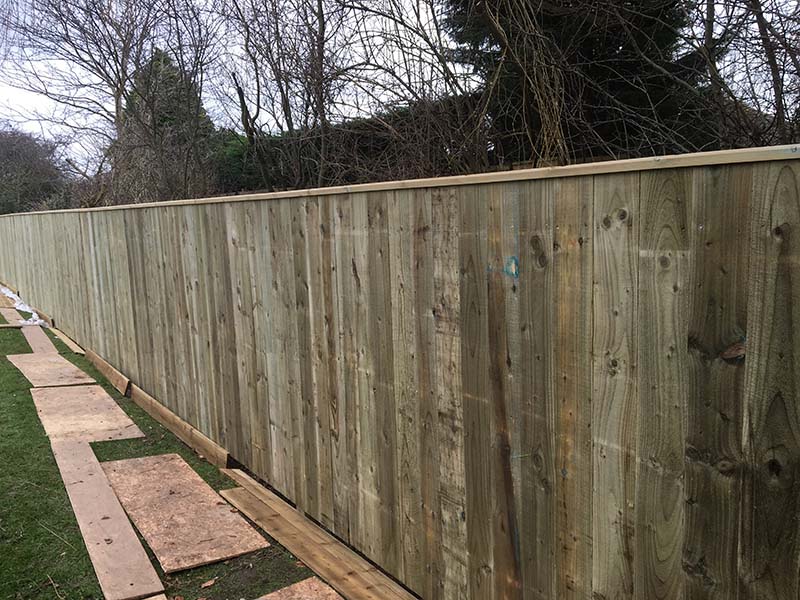

Now fixing the gravel boards. Different fencing companies have different ways to fix and place their gravel boards and this is what they are meant to be for. They are used as a sacrificial part of the fence when the fence will be close to touching or touching the earth or gravel as the name suggests, they can be changed to new ones as they rot and not effect the fence boards themselves. I prefer to place my gravel boards on the face of the fence this keeps all the fencing boards from bending in the changing weather. You can place your gravel boards underneath the fencing board and boards sit on top of it. You will, however, see the boards flex and bend over time unless you have the boards real close to the bottom rail. But as I said there are many ways to fix gravel boards, but this is the way I like to do mine and it works really well and I’ve never had any complaints. You can see example’s in the images of the finished fence.
Tools Needed: Hammer or Nail Gun, Wood Saw, Spit Spade, Spirit Level, Bucket, String Lines
Materials Needed: 19mm or 15mm 6ft Fencing Boards, 8ft 100mm x 100mm Fence Posts, 37mm x 75mm Fencing Rails, PostFix, Capping, Gravel Boards or Fence Boards, Nails or Nail Gun Nails 55mm and 75mm Galvanised Ring Nails
Treatment or Painting Fence: You can find lots of different colors of fence paint or treatments to take care of your new fence. Go to your local DIY shop or builders merchants and you will find lots to choose from and lots of free advice
If you have any questions that you would like me to answer..? Then please comment and I will help you as much as possible.
Building a new fence is not as hard as it seems and you can build it yourself at half the cost of getting it installed by a professional, so if you are feeling adventures then why not give it a go there are lots of videos and how to help out there on the internet.
Author: C Langstaff
One Property Maintenance
PS: If you have a project you will be undertaking and would like to ask me a question then please feel free to comment or if you would like me to write an article on a new patio or decking, whatever you would like to see that I complete in my day to day business then also comment and I will post as soon as Incomplete a project like this.
1 Comment
Any questions or queries you my have just leave them in the comment section and I will do my best to answer them. Remember you do not have to start with such a large project, maybe its just a small fence or repair. (Old Saying) From little acorns do big oaks grow and so will you and your skill level, as you take on bigger and more complicated jobs
Recent Posts
Recent Comments
How To Guides
Archives
Awesome Posts
Follow Us!
Tag Cloud
Next Previous Testimonials